Iowa City (319) 321-6401 |

Brunei Kratom: A Comprehensive Guide to Effects and Dosage
Imagine navigating the dense rainforests of Brunei, uncovering the hidden

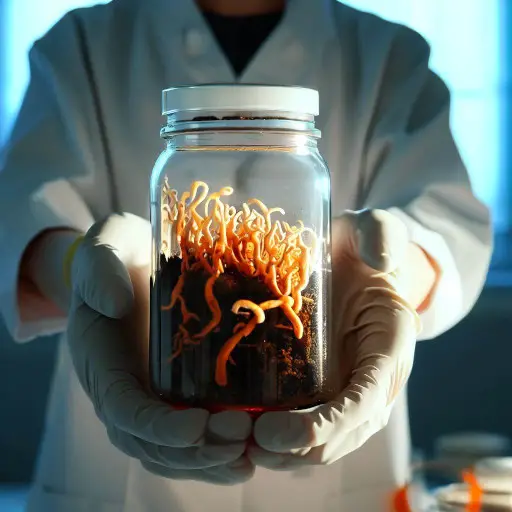
Growing mushrooms is a thrilling experience! A few years ago, I was inspired by my neighbor’s success, who grew some gorgeous Cordyceps mushrooms. After seeing what he did, I decided to try it myself, and now I can proudly say that I’m an expert at growing these delicious fungi.
In this article, I’ll share everything you need to know about growing Cordyceps mushrooms – from preparing the growing media to harvesting your crop. With my help, you’ll soon enjoy all the benefits of growing your Cordyceps!
Related: Ready to supercharge your health? Dive into the fascinating world of cordyceps mushrooms and their amazing properties by reading Cordyceps Mushroom Natures Answer.
Table of Contents:
Prepare a nutrient-dense substrate to provide an excellent source of vitamins, carbon, and nitrogen for the fungus with the combination of a nutrient broth recipe and grain. Culturing a substrate is essential for growing Cordyceps mushrooms, so creating suitable media filled with nutrients is imperative.
Pour 500 milliliters of water into a blender. Add one tablespoon of light malt extract and one tablespoon of nutritional yeast. Mix the broth on medium speed for 1 minute.
Pour ¼ cup of brown rice and two teaspoons of soybeans into a Mason jar. Add 45 milliliters of broth to the Mason jar. Avoid adding foam to the Mason jar.
Seal the jar with a lid and cover it with tin foil. I’ve found an ideal solution for a Mason jar lid that eliminates the need to create your own. These are ready-made lids that don’t require drilling holes, buying filters or gaskets, and no assembly! Mycology Supply provides culture lids with built-in filters and injection ports. You can obtain Mycology Supply Jar Lids by clicking here.
The next step is to pressure sterilize the jars for 45 minutes in a pressure cooker. Allow to cool to room temperature. You are prepared for inoculation!
Cordyceps mushroom substrate recipe:
*This recipe makes eight jars of the substrate.
Using a laminar flow hood, quickly grab a wedge of the Petri plate and drop it into the jar or inject ten ccs of liquid culture.
If you’re a newbie to the field and looking to buy a laminar flow hood, Mycology Supply offers the top-notch option at an affordable price. Click here to explore the entry-level hobbyist laminar flow hood from Mycology Supply, known for its exceptional airflow quality.
Incubating Cordyceps mushrooms in a sterile environment is essential. Use isopropyl alcohol to sterilize all surroundings and equipment. Place the jars in a dark environment. Here are some tips for successful inoculation:
With these simple pointers in mind, you’ll be well on your way to cultivating healthy Cordyceps mushrooms!
You can now sit back and watch your fungi flourish – it typically takes 15 to 20 days for the mycelium to colonize the substrate completely! During this incubation period, keep the temperature between 65 and 70°F, which is optimal for Cordyceps growth.
The spawn rate also significantly affects how quickly the fungus colonizes its environment, so make sure you’ve inoculated enough of it. You may find that light levels affect the density, texture, and pigmentation of your mycelium culture, too; if this is something you want to explore, be sure to adjust your experiment accordingly.
You can expect exemplary results from your mushroom-growing endeavors with patience and careful attention!
After cultivating and nurturing the mycelium, it’s time to witness the fruit of your labor: pinning and fruiting! The process is simple yet crucial to successful cultivation. Here are some tips to remember when pinning and fruiting Cordyceps mushrooms:
Harvesting your hard work can be a rewarding experience as you witness the beauty of these delicate fungi blooming in all their glory. Data shows that jars yield 12 grams of fruiting bodies and 51 grams of substrate and mycelium – a true testament to your efforts!
The Cordyceps will be fully mature between the 50th and 60th days. When harvesting Cordyceps mushrooms, it’s imperative to use gentle techniques not to damage the fragile caps. Some popular methods include scissors and cutting just above the substrate line.
After harvest, mushrooms must be dried quickly for long-term storage. The most effective way to do this is by hanging them upside down in an area with plenty of airflow until they are brittle enough to break apart easily. With proper harvesting methods and drying techniques, you can ensure that your hard work will not be wasted!
Need help with your crop? Don’t worry; troubleshooting is here to help! As with any farming, disease prevention and environmental factors are key when growing mushrooms. Here are some tips for keeping your Cordyceps healthy:
With these steps in mind, you can identify potential issues early on and correct them quickly, saving you time, money, and energy along the way!
I’ve successfully grown Cordyceps mushrooms! It was an exciting journey that required patience and effort. I followed each step carefully, from creating the growing media to inoculating it, incubating, pinning, and fruiting.
Fortunately, my hard work paid off when I harvested a beautiful crop of Cordyceps mushrooms. Coincidentally, I found that many of the same techniques used for growing other fungi also apply to Cordyceps; it’s just a matter of knowing what you’re doing and being patient enough to wait for them to grow.
Don’t wait any longer to enjoy a strengthened immune system, slower aging, better digestion, and improved athletic performance.
Related: How to Use Cordyceps Mushroom
Related: How to Cook with Cordyceps Mushrooms

Imagine navigating the dense rainforests of Brunei, uncovering the hidden

Have you ever wondered why Trainwreck Kratom has sparked such

To effectively combat headaches, specific Kratom strains stand out for
Subscribe for exclusive deals and updates!
